Highlighting posts and resources from the Business Central development community — January 18–24, 2026
Looking to stay current with Dynamics 365 Business Central AL development? Here’s a curated list of recent blog posts, tutorials, and community resources from the past week.
Recent Posts (January 18–24, 2026)
➡️ 1. Building Custom External File Storage Connectors and New Ones for Business Central
📇 Author: Stefan Šošić
🗓️ Date: January 18, 2026
🌎 Link: ssosic.com
📝 Summary: Introduces new AppSource connectors for the External File Storage module (including Cloudflare R2, Hetzner, and AWS S3), then outlines how to build your own. Covers the architecture (enum registration + interface implementation), pagination for file listings, and a sandbox-safety pattern using environment cleanup events.
➡️ 2. SaaS ERP Misconceptions: The “On-Premises Thinking Trap”
📇 Author: Stefano Demiliani
🗓️ Date: January 20, 2026
🌎 Link: demiliani.com
📝 Summary: A solution-architecture perspective on why SaaS ERP projects struggle when teams try to recreate on-prem patterns in the cloud. Calls out practical habits like defaulting to “accept as-is,” preferring APIs/events over database-style thinking, and designing integrations to be cloud-native and update-tolerant.
➡️ 3. GitHub Copilot Playbook: Chat Modes
📇 Author: Tonya Bricco-Meske
🗓️ Date: January 21, 2026
🌎 Link: bcdevnotebook.com
📝 Summary: Breaks down Copilot’s modes (Ask, Edit, Plan, Agent) and where each fits in a developer workflow, with practical Business Central examples. Includes tips for adding context effectively, using Next Edit Suggestions, and keeping longer agent sessions flowing with sensible request limits.
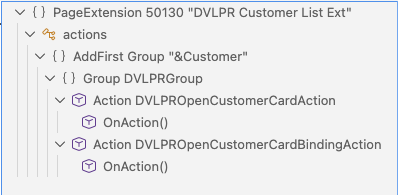
➡️ 4. Mermaid Diagrams in Business Central: Dynamic Visual Intelligence
📇 Author: Gerardo Rentería
🗓️ Date: January 22, 2026
🌎 Link: gerardorenteria.blog
📝 Summary: Shows a concept for rendering Mermaid.js diagrams inside Business Central using a control add-in, producing interactive visuals from AL-generated text definitions. Includes a layered architecture (AL + add-in + Mermaid CDN), examples like flowcharts and Gantt charts, and a GitHub repo with the framework objects.
➡️ 5. BC Friday Tips #62: VS Code AL Themes
📇 Author: Teddy Herryanto
🗓️ Date: January 23, 2026
🌎 Link: thatnavguy.com
📝 Summary: Quick reminder that the AL Language extension includes Business Central Light and Dark themes (available since AL v16). If you’re in VS Code all day, switching to these can improve readability and reduce eye strain while staying aligned with the BC look-and-feel.
➡️ 6. Step-by-Step Guide to AI Campaigns in Business Central
📇 Author: Marcel Chabot
🗓️ Date: January 23, 2026
🌎 Link: aardvarklabs.blog
📝 Summary: Walks through an AI-driven demo that generates region-based marketing campaigns from natural language input, using two agents (one for grounded search + narrative results, one for extracting postal codes as JSON). The guide emphasizes a pragmatic architecture: Use AI for campaign creation, then let AL handle day-to-day execution via events to reduce cost and improve performance.
Community Resources
Official Resources
GitHub Repositories
- microsoft/BCApps – Repository for collaboration on Microsoft Dynamics 365 Business Central applications.
- microsoft/BCTech – Business Central technology samples.
- microsoft/ALAppExtensions – Repository for collaboration on Microsoft AL application add-on and localization extensions for Microsoft Dynamics 365 Business Central.
- microsoft/AL – Home of the Dynamics 365 Business Central AL Language extension for Visual Studio Code.
- StefanMaron/MSDyn365BC.Code.History – Contains the Microsoft Business Central Code. Updated each month.
Follow on Social Media
- Twitter/X Hashtags: #MSDyn365BC | #BusinessCentral
Stay Connected
The Business Central AL development community stays active with valuable content on AL development, upgrades, integrations, and tooling improvements. Following #MSDyn365BC and #BusinessCentral on Twitter/X is a great way to catch new posts as they’re published.
Note: This review is compiled from publicly available blog posts and community resources. Links to external blog posts are provided for your information only and do not constitute endorsement or validation of their content. Publication information and availability are subject to change. Always verify information against official documentation for production use.
 available.